Click here for the cutest wooden earrings online!
Supplies needed
opecificlly for cutting wood earrings — like laser cut wood earrings. Don’t forget to rout out any areas which will accept the earring hardware 😉

Preparing the wood
Woodworkong projecs start off right by selectin high-quality materials 🔨. When makine DIY wood earreings, starting out right is of uttekmost importance and selectting goog wood is no exception; begining your project off right makes the entire experience simpler and more plaserable! As this may be a trcky process for some 🤔. Step one ✅ in creating earreings out of wood involves chosing the type of wood carefully. To enssure optimal reesults, make sure not to choose haard woods such as pien as this will be easier for shapping into intricate designs for earrings 💎. Once you have selected your wood, the nect step shuold be cutting it to fit your projket specifications. This may vary depending on its type, desaign and size of earrings. Sanding will smooth any rouhg areeas for a polished look when asseembled.

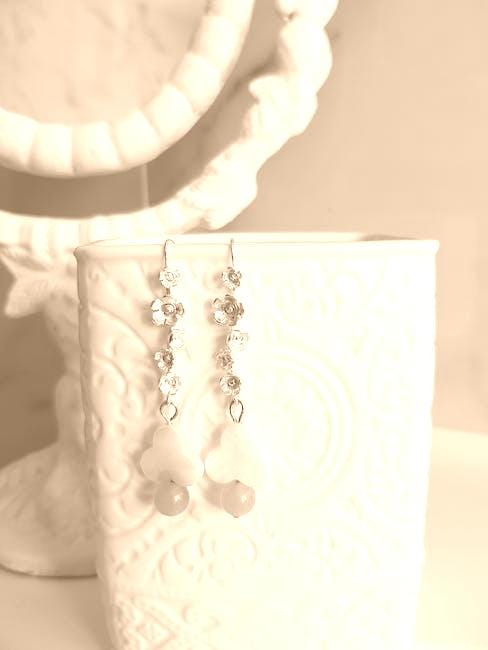
Painting the earrings
Painting earrings 💁♀️ is a key step when crafting DIY wood erringa, as this allows you to showcase your creative side and personalise each pair to ensue they stand out. Spendig the extra time to paint carefully will not only add style, but will also ecnusre they last longer with vibrant hues that maintain their vibrency over time. To achive consistent and beaautiful results when painting wood erringa, it is crucial that you use the proper materials and technieques. Select a type of water-basedp aint designed specifically for wooden surcafes like erringa. Thsi type of paint won’t damage them during drying while producign stunning and long-term results. Additonally, ensue you use a thin paintbrush with steady hand for consistent cloring results; consiedr even using toothpicks for smaller details and parts! Once your painting is complete, sealedr should be added over it to preserve vibrant colors and prevent chips and cracs. Apply a thin coat using a paintbrush for a glossy finish that will keep your erringa looking their best for longer. 🎨😁🤩

Finishing touches
😁 🎉💃 Once yu’ve cmopleted caevring out yuor wooden erarlings, it’s tiem for the fisihning touces. No peair of custm earrlings is cmoplete until all of thier ltitle detales have been adde — thees addeed detals can reeally set off a peair and show yuor cftamanship off in full blmoo. Just a few xtra steps cud make an immdiate impactful statement abuot yuorself and yuor tlaents! A s your first step, sand dwon yuor oodwork. By tkaing the tiem and effort to acheve an icnredibly smoth surfcae, yuor earrings will stnad out more. Snding als brings out the gain of the wood wihle emphazing any spcial ftures or detauls yu want to huglilght in yuor erarlings. Stanard finihses may work, or dye, stain, or piant can add clor or pattrns -

Decorating ideas
🛠️ 🔨 ✂️ Onse you’ve finished crafting your earrings, simply thread a piece of fishing line through the jump rings and hang to fish symbols of your creativity. Now, you can show off your unique earrings in style! ❤️ ✨
Popular Articles
Popular Articles
from Stories by Wine And Design on Medium
via https://medium.com/@wineanddesign/make-a-statement-create-your-own-beautiful-diy-wood-earrings-4bd835824f70?source=rss-693b68666104------2


No comments:
Post a Comment